
Hi! Welcome to Hoory AI! In this user guide, we'll demonstrate how to create a pre-chat form.
What is a Pre-Chat Form?
A pre-chat form is a special form used to collect information about a contact or conversation just before initiating the conversation.
Creating a Pre-Chat Form
1. Navigate to Settings → Channels.
2. Click the Settings icon of the channel where you want to create a pre-chat form.

3. Then, click "Pre Chat Form" from the horizontal bar of tabs.

4. Enable the pre-chat form functionality by selecting "Yes" from the dropdown. This action will expand the pre-chat form fields below.

5. Click the toggle button for all the fields that you want to include in the form.
Fields Overview
The fields shown in the table include:
- Key: Unique field identifier
- Type: Type of field (text, number, link, date, list, or a checkbox)
- Required: Is the field required or not?
- Label: The label displayed to the visitor on the widget
- Placeholder: The placeholder value

Types of Pre-Chat Form Fields
There are two types of fields in the pre-chat form:
Standard Fields: Primary contact fields, including full name, email, and phone number.
Custom Fields: Fields created via custom attributes.
Admin Actions
Admins can perform various actions with fields:
- Enable/disable fields
- Change field order
- Update label/placeholder
- Enable/disable validation
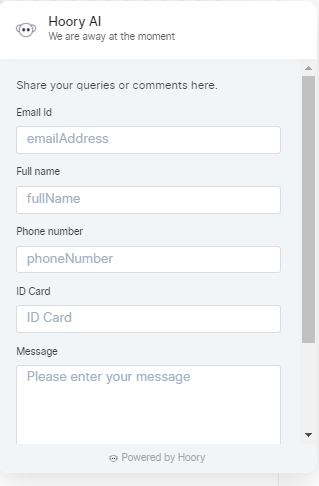
Form Appearance
Once the pre-chat form is enabled and someone starts a conversation, it will display a form with the configured fields.
That's it. Easy as that.
Wrapping up, as you learn the fundamentals, remember there's so much more to explore with Hoory AI. The journey doesn't end here—keep experimenting, learning, and innovating with your AI assistant to unlock its full potential.