
Hi there! Welcome to Hoory AI. In this user guide, we'll demonstrate how to create labels in Hoory AI.
What are Labels?
Labels are colored tags designed to help you categorize, prioritize, and quickly filter conversations. They provide an efficient way to organize your workflow. You can assign custom-colored labels to conversations directly from the chat's side panel.
Adding Labels
Follow these steps to add new labels:
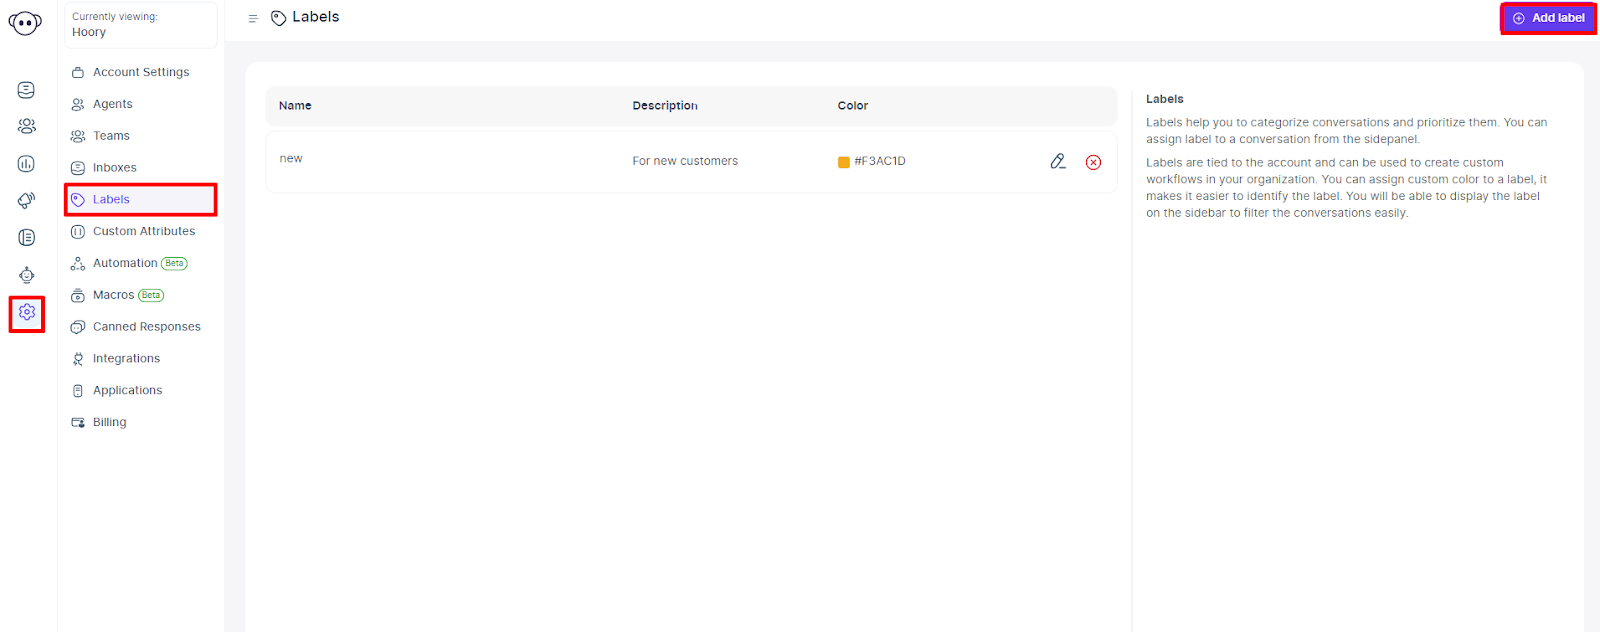
- Click Settings.
- Navigate to Labels.
- Click the "Add Label" button.
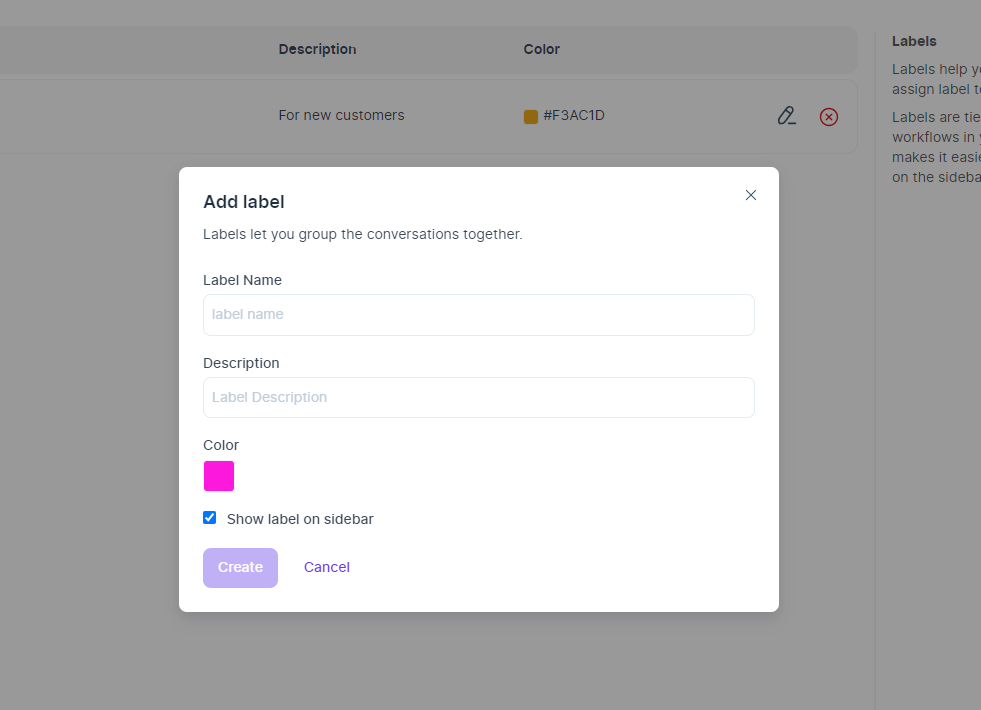
Upon clicking the "Add Label" button, a pop-up window will appear. Follow these steps within the pop-up:
- Type in a label name.
- Add a brief description.
- Choose a color for the label.
- Tick the checkbox to see the label on the sidebar.
- Click "Create."
A success message will confirm your action.
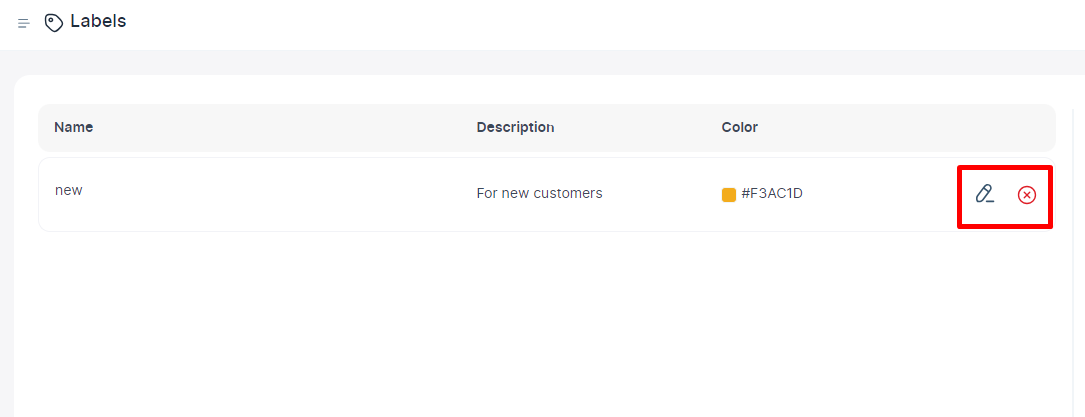
Managing Labels
You can manage labels by:
- Editing label details.
- Deleting labels if no longer needed.
Assigning Labels to Conversations
- Navigate to Conversations → All Conversations.
- Check the conversation/s you want to label.
- At the top, click "Assign Labels."
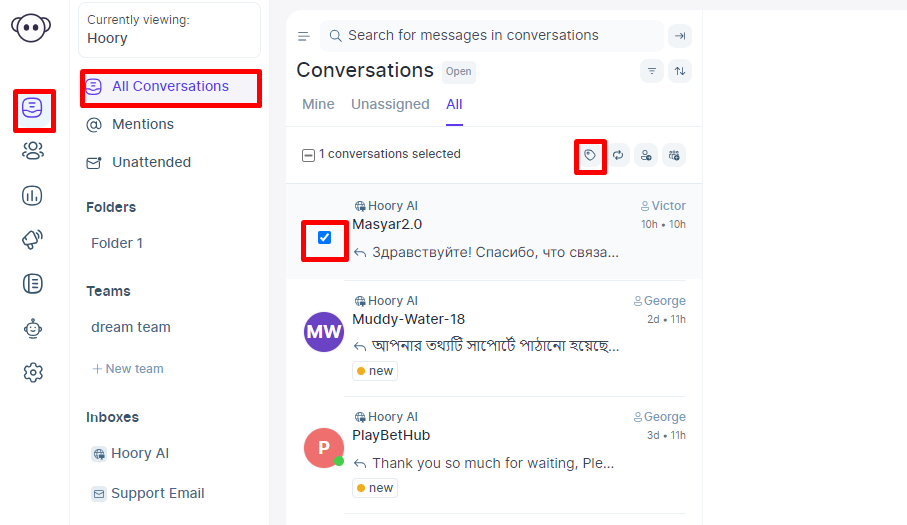
4. A dropdown will appear with a search bar and a list of labels.
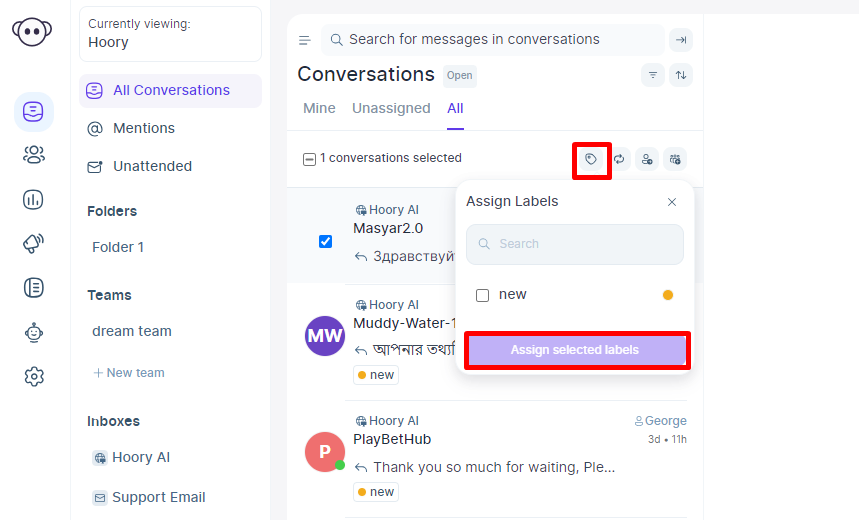
5. Choose the label and click "Assign selected labels" to attach it to the conversation.
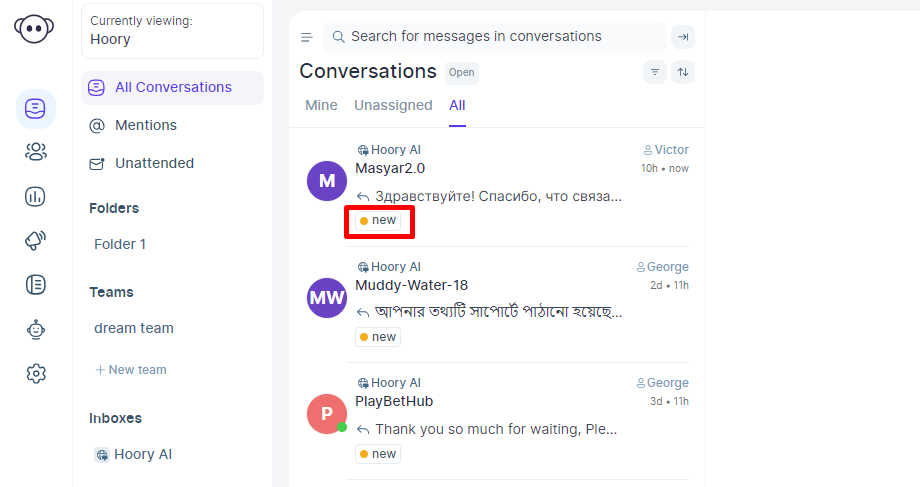
That's it!
Wrapping up, as you learn the fundamentals, remember there's so much more to explore with Hoory AI. The journey doesn't end here—keep experimenting, learning, and innovating with your AI assistant to unlock its full potential.