
Hi! Welcome to Hoory AI. In this user guide, we'll show you how to add agents to your channel in Hoory AI.
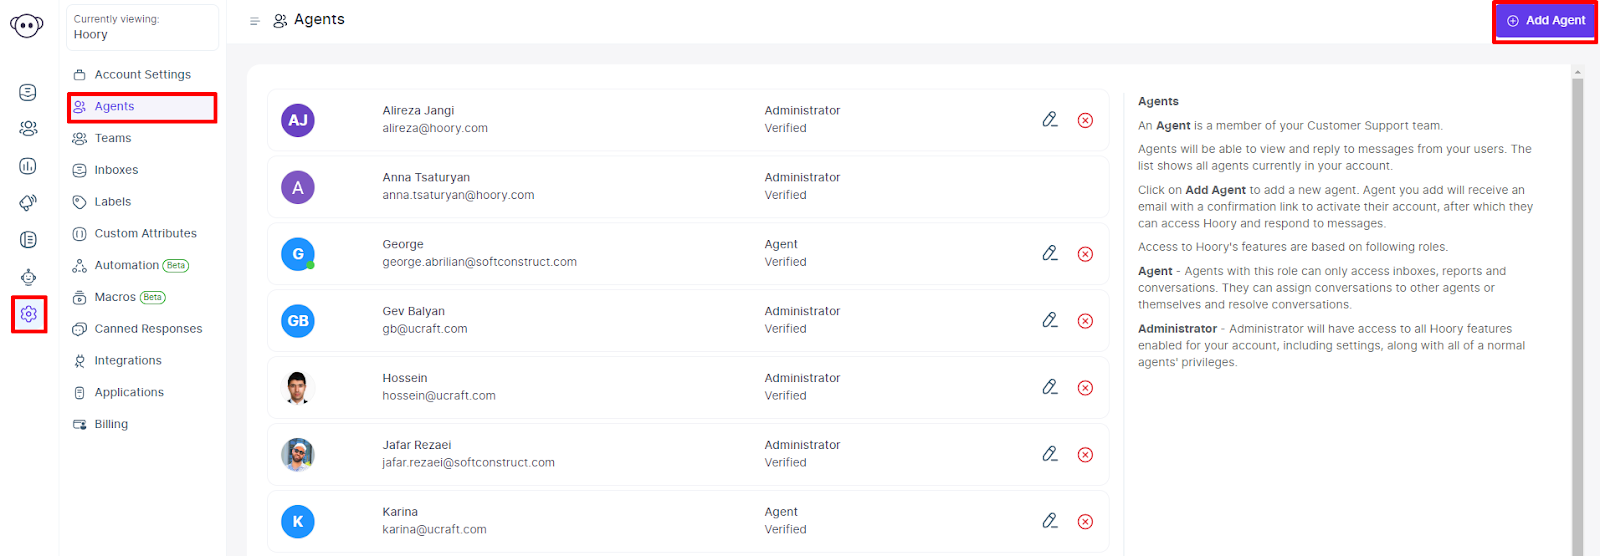
What is an Agent?
An agent is a member of your customer support team. They can view and respond to customer messages when added to your channel.
Adding Agents
- Click Settings and select Agents on the left sidebar.
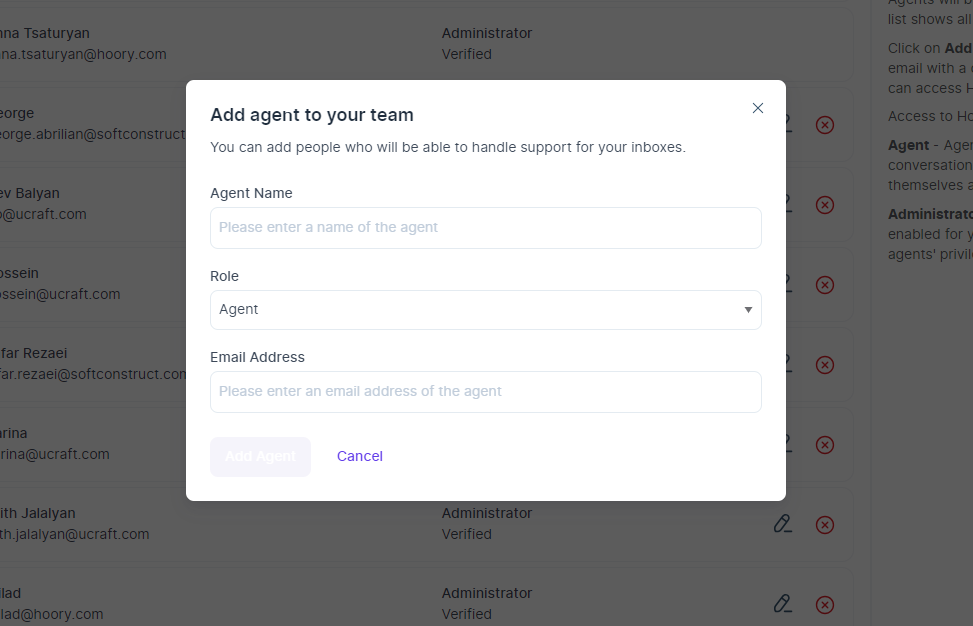
2. Click the "Add Agent" button at the top right corner of your screen, and it will open a pop-up window.
3. Enter the agent's details: name, role (administrator or regular agent), and email address.
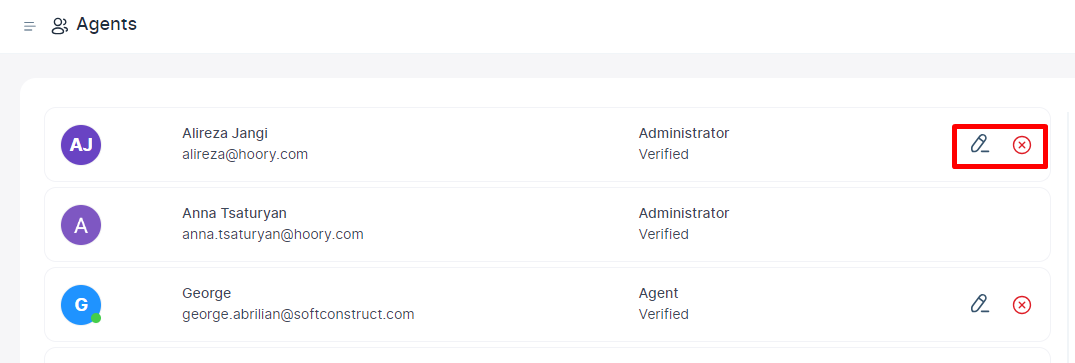
4. Click "Edit" if you want to update the agent's details. To save the changes, click "Edit Agent" at the end.
5. If an agent is no longer part of your team, use the delete button to remove them from the channel.
That's it!
Wrapping up, as you learn the fundamentals, remember there's so much more to explore with Hoory AI. The journey doesn't end here—keep experimenting, learning, and innovating with your AI assistant to unlock its full potential.