
Hi! Welcome to Hoory AI. In this user guide, we'll walk you through the process of creating a website-based channel on Hoory AI. Let's get started!
Creating a Website-Based Channel
There are two easy ways to create a website-based channel on Hoory AI:
Option 1: From the Conversations Tab
Click on the + New Channel from the Conversations tab, which is open by default.
Option 2: From the Settings Tab
- Navigate to the Settings tab in the left sidebar.
- Click Channels from the expanded list of tabs.
- Click the Add Channel button at the top right corner.

The 4-Step Flow
Regardless of the option you choose, both actions will open up the 4-step flow of the channel creation process:
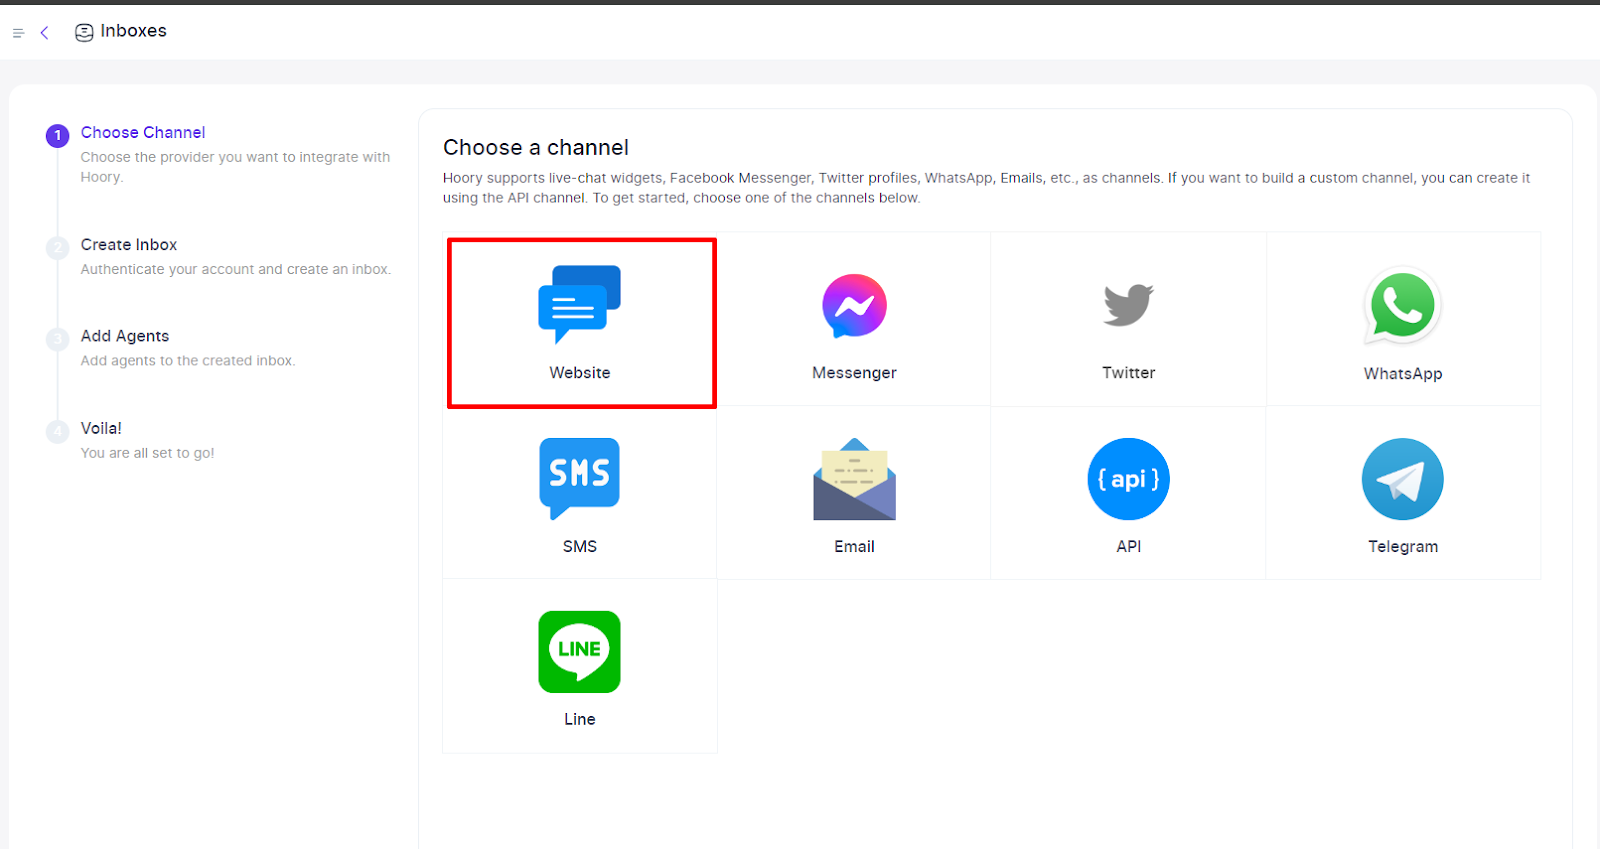
Step 1: Choose a Channel
Click "Website" to set up a website-based channel.
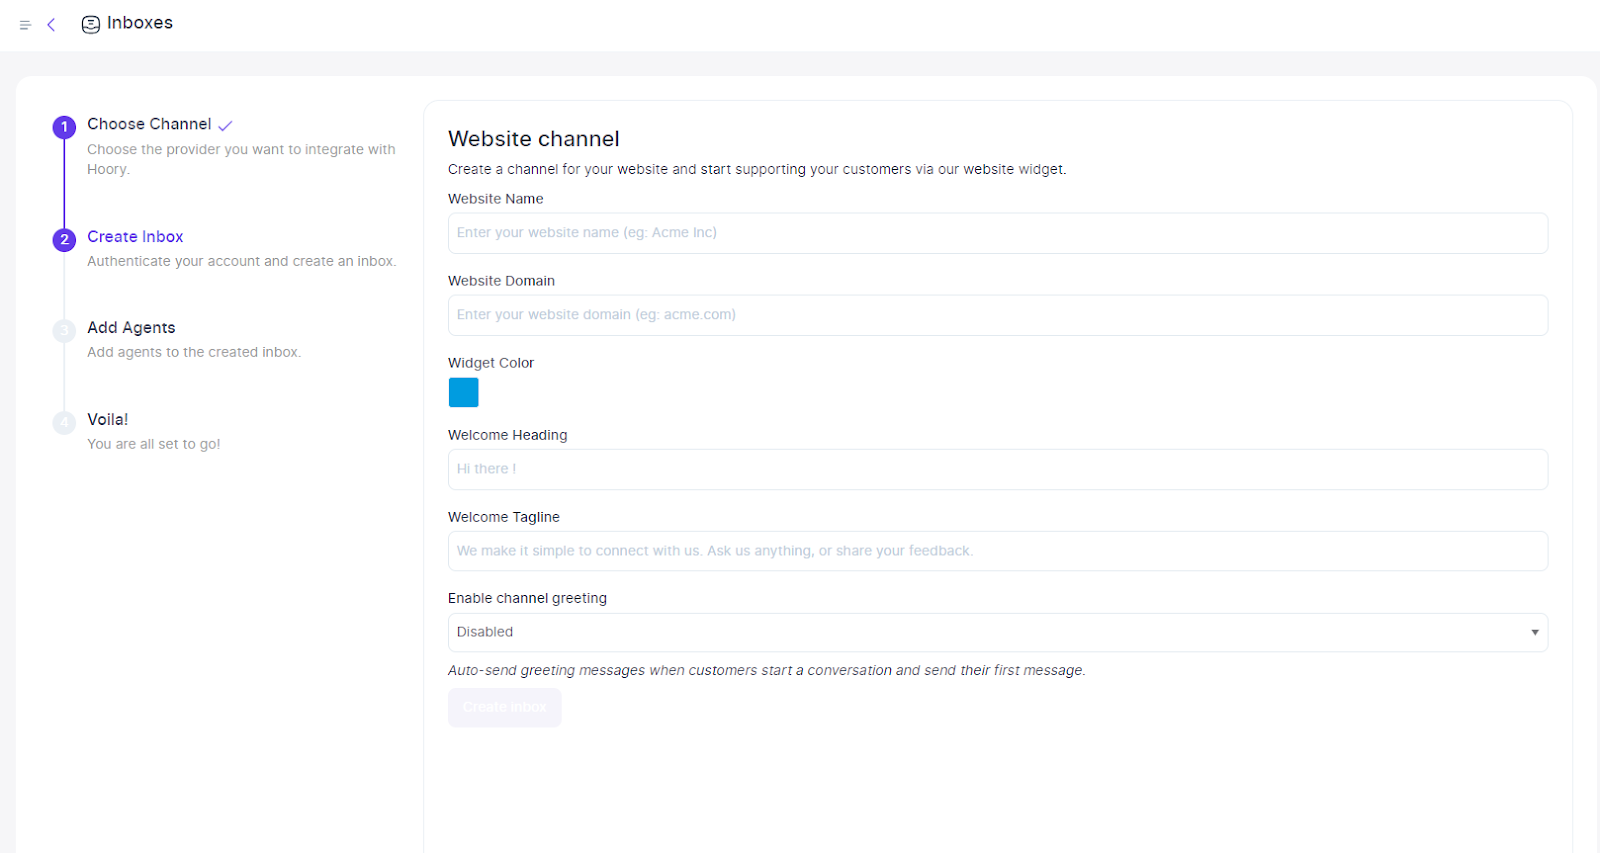
Provide the necessary information in the fields, including:
- Website name
- Website domain
- Widget color
- Welcome heading
- Welcome tagline
- Enable or disable channel greeting functionality (choose whether to automatically send a greeting message to customers).
Step 3: Create Channel
Once all fields are filled in, the Create Channel button will activate. Click on it to finalize the process.
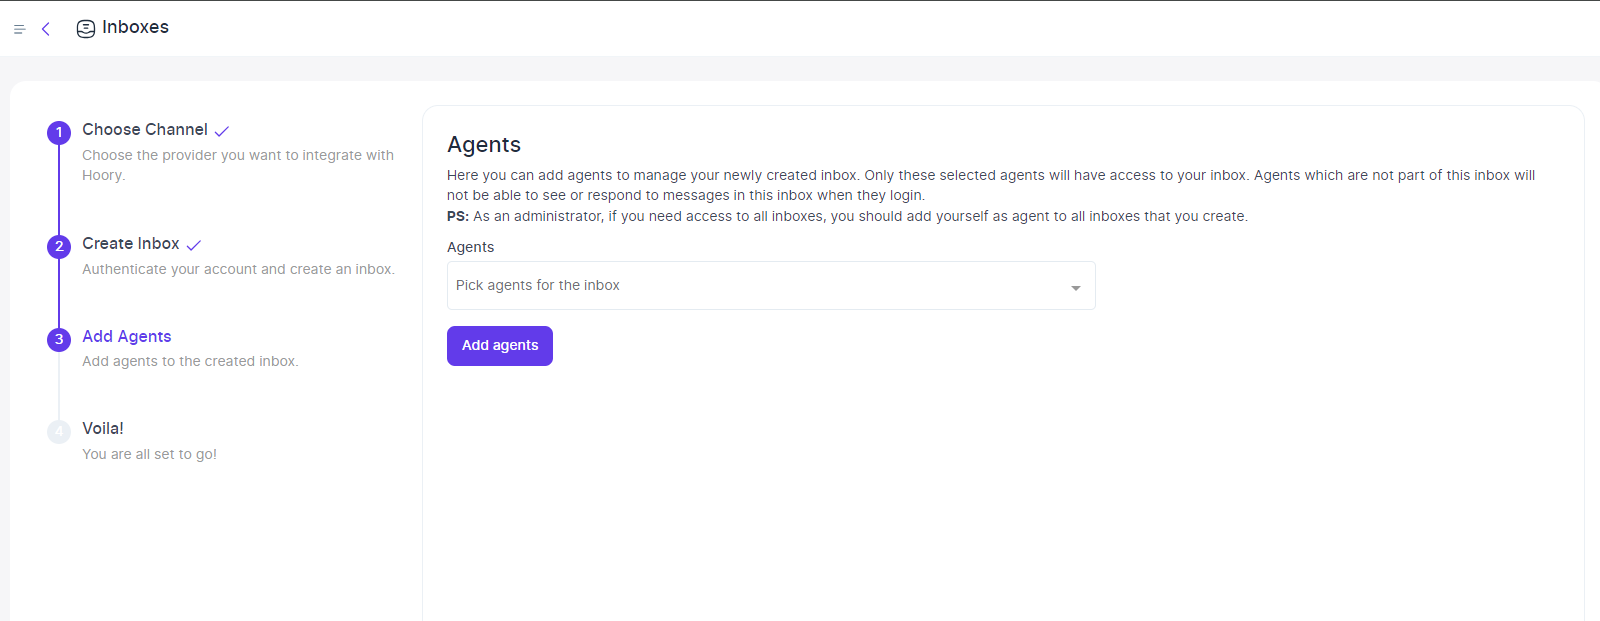
Step 4: Add Agents
Add agents from the dropdown menu.
Click the Add Agents button to associate them with the created channel.
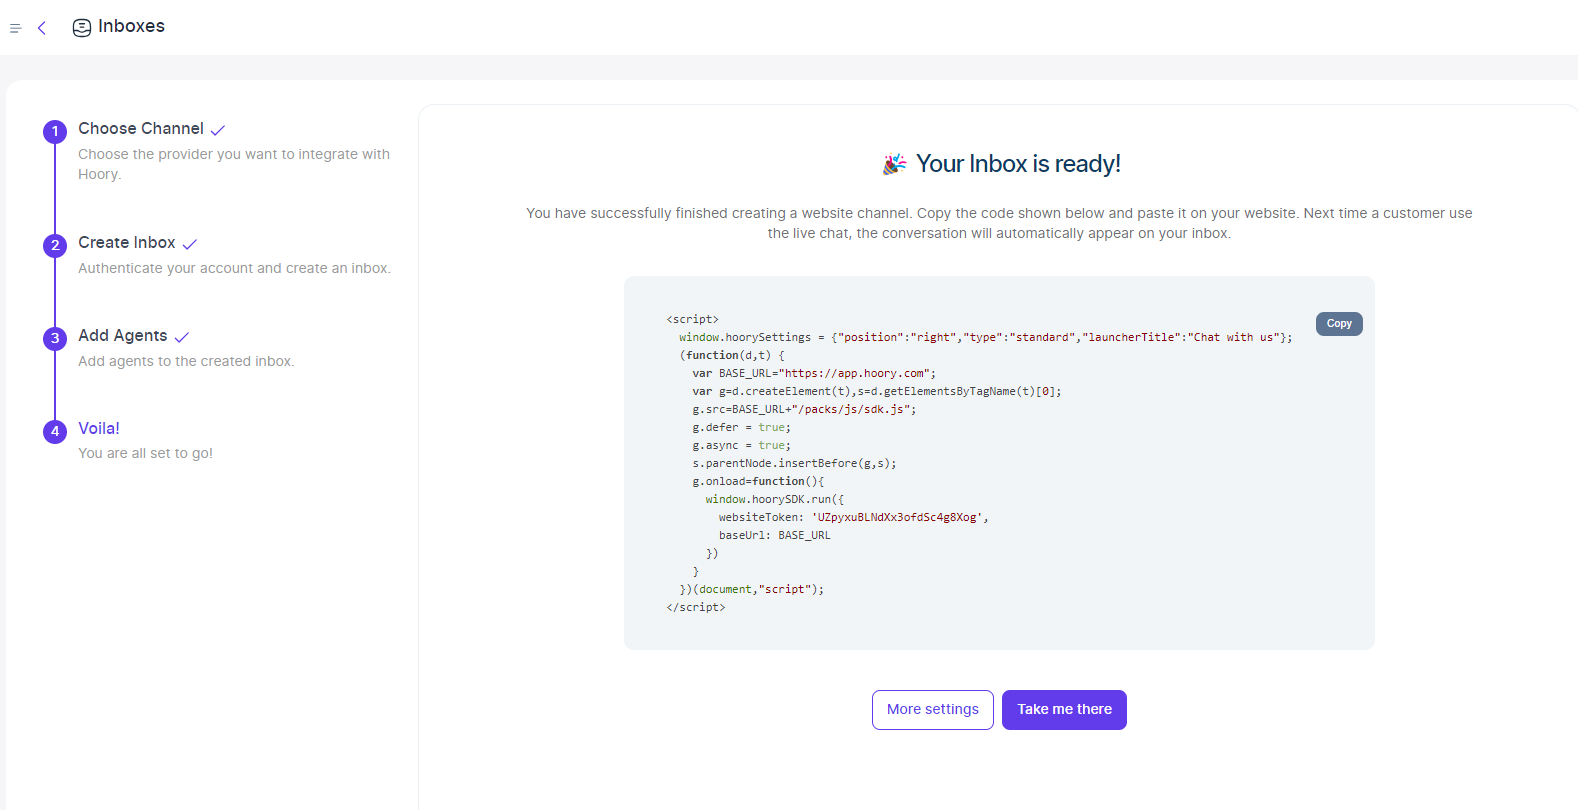
Final Steps
Congratulations! Your website widget is now created.
Click "Take me there" to view and integrate it seamlessly on your website.
Wrapping up, as you learn the fundamentals, remember there's so much more to explore with Hoory AI. The journey doesn't end here—keep experimenting, learning, and innovating with your AI assistant to unlock its full potential.